






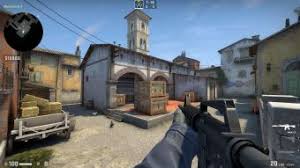
If you are still making content for Source Engine in 2026, you already know the struggle. The tools are old. The documentation is scattered. And Windows 11 seems to break something new every other update.
But the community is still here. Mods are still releasing. And with a few specific fixes, you can keep working without wanting to throw your PC out a window.
I wrote this guide because I got tired of hunting through eight different forum threads every time I reinstalled SFM or tried to compile a model. Everything below comes from actual trial and error—mostly error.
What People Are Actually Playing Right Now
It is easy to assume the Source modding scene died in 2018. That is not true. It just went quiet.
The Best Source Engine mods 2026 are mostly small, focused, and weird. No more ambitious half-life conversions that never release. Instead, you get tight horror experiences and multiplayer mods that run on anything.
Some standouts worth your time:
- Swarm 2026 – A standalone co-op shooter where you fight insect waves. Feels like Left 4 Dead meets Starship Troopers.
- INFRA Remastered – Not new, but the 2026 community patch fixes the lighting bugs that broke on modern GPUs.
- Dark Interval – Still the best unreleased HL2 episode you can actually play. The latest chapter dropped in March.
None of these require a gaming PC. That is the whole point of Source.
Compiling SFM Models Without the Headache
You found a model online. It looks great. But it is a random collection of .smd and .qc files, and you have no idea how to turn it into something SFM can read.
Learning how to compile SFM models is frustrating because the official tools assume you already know what you are doing.
Here is the simple version that works in 2026:
What you need:
- Crowbar (version 0.74 or newer)
- Source SDK 2013 (install it through Steam tools)
The actual steps:
- Put your .qc file and all .smd files inside a folder called model_sources inside your SFM game folder.
- Open Crowbar. Do not use the old GUI compiler from 2012. It crashes on Windows 11.
- Drag your .qc file into Crowbar. It will read the paths automatically.
- Click “Compile.” Wait.
Most compile errors happen because your material paths are wrong. In your .qc file, check the $cdmaterials line. It should point to a folder that actually exists inside usermod/materials/. If it points somewhere else, SFM gives you a purple checkerboard model and no error message.
One more thing: If your model has bones that SFM does not recognize (like custom rigs for wings or tails), you need to add $allowdownload and $allowupload to your .qc file. Otherwise the model compiles but crashes when you try to animate it.
Stopping SFM From Crashing Every Five Minutes
Windows 11 changed how it handles old DirectX 9 applications. Source Filmmaker is a DirectX 9 application. The result is random crashes, especially when you scrub the timeline or load a particle system.
To fix SFM crashes on Windows 11, you do not need to reinstall Windows or buy new hardware. You need to change three settings.
First: Launch options
Open Steam, right-click SFM, go to Properties, and paste this into Launch Options:
-dxlevel 95 -w 1920 -h 1080 -sfm_resolution 0 -noaahose -high
The -noaahose flag disables a specific anti-aliasing pass that triggers memory leaks on Intel and AMD chips.
Second: Driver version
This hurts to write, but the latest GPU drivers break SFM. If you have an Nvidia card, roll back to 537.58 or use the “Studio Driver” branch instead of “Game Ready.” For AMD users, version 22.5.1 is the last stable one.
Third: The DLL trick
Go to steamapps/common/SourceFilmmaker/game/bin/. Find stdshader_dx9.dll and rename it to stdshader_dx9.bak. Then verify your game files through Steam. It will download a fresh copy. This fixes the “failed to lock vertex buffer” crash that happens when you have too many models in a scene.
If SFM still crashes after these steps, disable the Steam Overlay for SFM specifically. The overlay injects code that conflicts with SFM’s renderer on Windows 11 22H2 and newer.
Making Source Engine Run Faster on Modern Hardware
Here is something nobody tells you: Source Engine runs worse on a 2026 gaming PC than it did on a 2004 Dell. The engine was not built for high core counts or modern memory architectures.
This Source Engine optimization guide focuses on getting smooth framerates in mods and SFM, not in standard Valve games.
The config changes that actually matter:
Open your game/cfg/autoexec.cfg file (create it if it does not exist). Add these lines:
text
Copy
Download
mat_queue_mode 2
r_queued_decals 0
cl_ragdoll_collide 0
r_shadowmaxrendered 4
mat_picmip -1
Here is what each one does:
- mat_queue_mode 2 forces multi-core rendering. Without this, Source only uses one CPU core.
- r_queued_decals 0 stops the engine from processing bullet holes and blood spatters in batches. This fixes the micro-stutter you feel when walking into a room with many decals.
- cl_ragdoll_collide 0 turns off collision between dead bodies. It sounds small, but in mods with heavy physics, this doubles your framerate.
- r_shadowmaxrendered 4 limits dynamic shadows to four lights. Most mods do not need more than that anyway.
- mat_picmip -1 makes textures sharper. It does not affect performance much, but it makes the game look less like mud.
One more thing for laptop users:
Source Engine defaults to your integrated GPU half the time. Force it to use your dedicated card through Windows Graphics Settings. Add the specific .exe for your mod (not just hl2.exe) and set it to “High Performance.”
Uploading to the Workshop Without Breaking Everything
You made something. You want to share it. You click “Publish to Workshop” and SFM either crashes or uploads a broken file that nobody can download.
This SFM workshop upload guide walks around those problems.
Step 1: Pack your custom content manually
SFM’s automatic content packer misses files constantly. Use VRF (Valve Resource Format) tool or GCFScape to open your session’s folder. Find every custom texture, model, and sound you used. Drag them into a folder called custom_content.
Step 2: Create a VPK
Do not upload loose files. The workshop hates loose files. Download VPKCreator (the 2024 version works fine) and pack your custom_content folder into a .vpk file.
Step 3: Upload through SteamCMD
The built-in uploader is unreliable. Install SteamCMD (command-line version of Steam), log in, and use this command:
workshop_build_item <your_mod_id> <path_to_vpk>
You can find your mod ID by creating a dummy upload first, canceling it, and copying the ID from the console.
Step 4: Write a description that helps people
Do not just write “my first animation lol.” List the required mods, the version of SFM you used, and any known issues. People will actually download your work if you respect their time.
Also, if you want to share your workflow or get feedback from other modders, you can post your workshop links on playnox.net—there is a dedicated thread for show-and-tell where people actually give useful critique instead of generic “nice work” comments.
One Last Thing
Source Engine modding in 2026 is not glamorous. You will fight with compile errors. You will crash at the worst moment. You will wonder why you are doing this instead of using Unreal Engine 5 like a normal person.
But when your mod loads for the first time, or when someone leaves a comment saying your animation made them laugh, it is worth it.
Keep your drivers locked to a stable version. Keep your autoexec.cfg backed up. And keep making things.